I’ve been involved in the print industry since my first job operating a sheet-fed one-color press in 1984 (no, it wasn’t the one Gutenberg invented, thank you very much). Although I’ve made multiple kinds of products, both physical and digital, printer’s ink flows through my veins.
Since those ancient days, technology has made it easier for folks to create their own printed material – however, there are aspects to printing which may be simple to folks with my experience but are alien and confusing to those who are new to printing.
This is understandable if you’re self-taught. However, I am flabbergasted at how many design students graduate with a degree and still don’t understand the concept or the necessity of bleed.
What is “Bleed”
In the simplest terms, “bleed” is what allows printed matter to print from edge to edge on the paper.
If you’ve ever received a travel brochure or a sales flyer, and it’s covered in color and images right up to the edge of the paper, that’s because the designer used bleed in their original artwork.
To understand this, let’s look at the print process from start to finish.
- Let’s say you want to make a, 8.5”x11” sales flyer for your travel company. It would include a picture of travelers and bold graphics that go right to the edge of the paper.

- This is not achieved by creating art that is only 8.5 x 11 and simply “printing full page”. The art needs to extend or “bleed” past the edges of the paper to achieve the “printed full page” effect.
So, How the Heck Do I Extend the Art Past the Edges of My 8.5×11 Sheet if It’s An 8.5×11 Sheet?
Simple. It’s not printed on an 8.5 x 11 sheet.
It’s printed on one that is slightly bigger, then the paper is trimmed down to 8.5 x 11.
This is why you can’t get this effect on your home printer or a copy machine.
This can only be achieved via a professional printer who has presses that can handle the larger paper sizes and the machinery to trim off the edges.
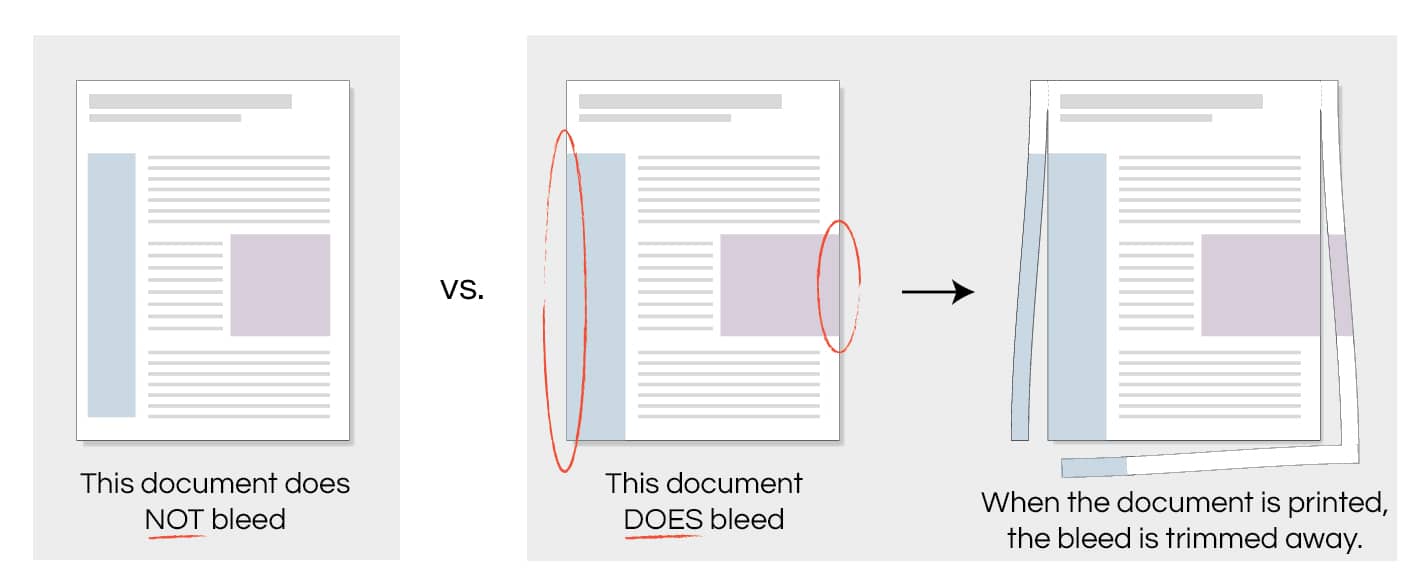 This is the simplest illustration I’ve ever seen of how bleeds work.
From MC Design and Print, Winter Park, Colorado.
Here’s how the process works:
- A designer will set up a design for an 8.5×11 flyer but extend the image beyond the 8.5×11 border (effectively “bleeding” it off the “edge”)
- The art is sent to the printer, who then prints it on a larger sheet, usually 9 x 12
- After printing, the excess “bleed” is trimmed by a, 8.5×11 box shaped metal blade called a “die” (you may hear some printers ask for “die lines” when printing odd shapes, but that won’t apply to simple jobs like this)
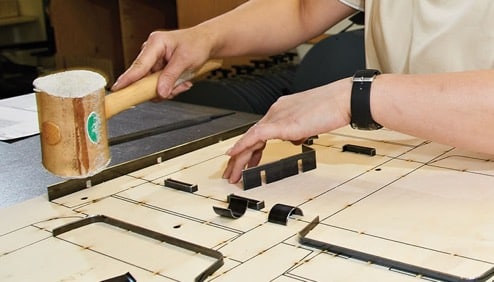
This is how a die is set. This is for a more complicated printed piece, like a package, but a die is basically a blade in the final shape of your printed piece. From Hotspot Printing & Packaging, Los Angeles, California
- The result is a clean, 8.5×11 sheet with print covering the whole sheet from edge to edge.
IMPORTANT NOTE: Why This Is Still Relevant in Modern-Day Printing
Those new to the print world may think this is a complicated way to achieve this, but the reason is rooted in the practical imperfections of the printing process itself:
- Printers shift when they are running: Whether it’s direct-ink-to-paper, or printing plate-to-paper, things never line up to the exact micron. Paper moves very fast through the printer, and sometimes might land a millimeter higher/lower or side-to-side on the print surface.
- Dies shift as well: Again, with the speed of paper flying through the machine, the die itself may come down a hair or two off (sometimes more if the machine is old or if the die is loose from continual use) when it slices the paper.
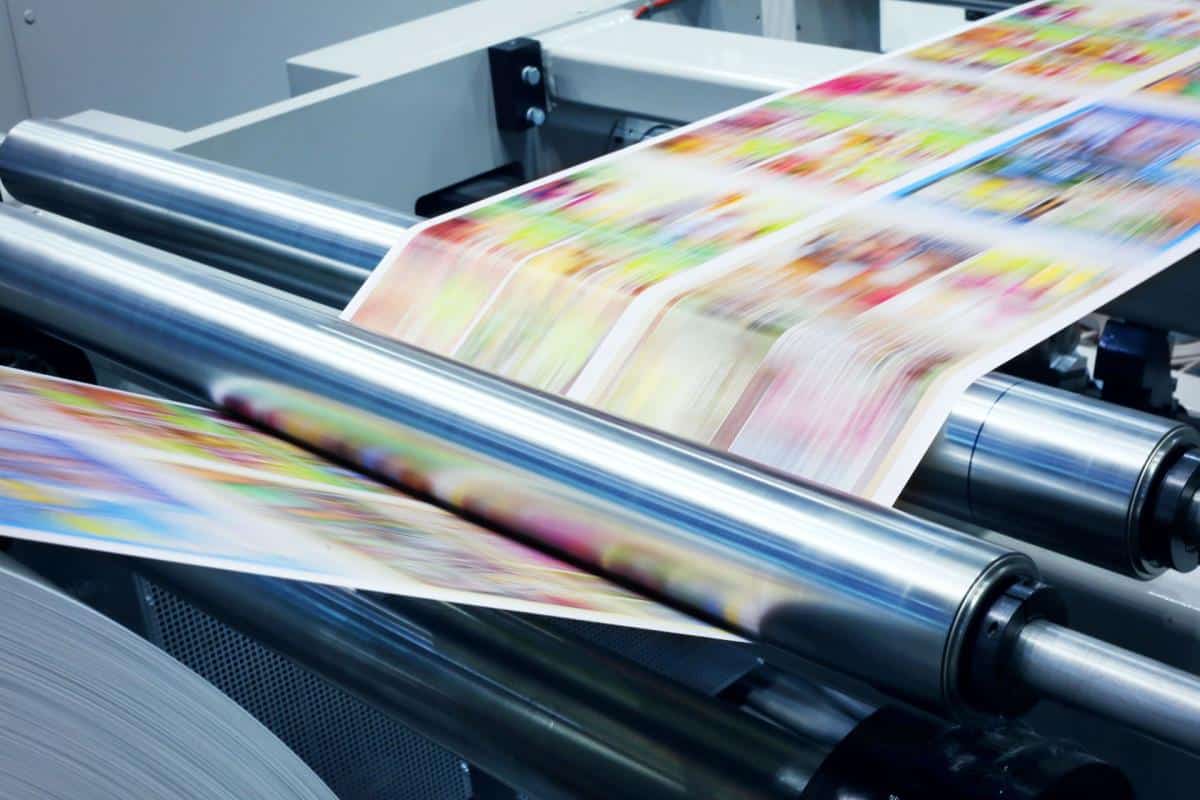
I double-dog dare you to slow this beast down enough to check alignments.
This process ensures that there are no unprinted edges on the final document. Here’s another good example straight from Amazon KDP’s own guidelines:
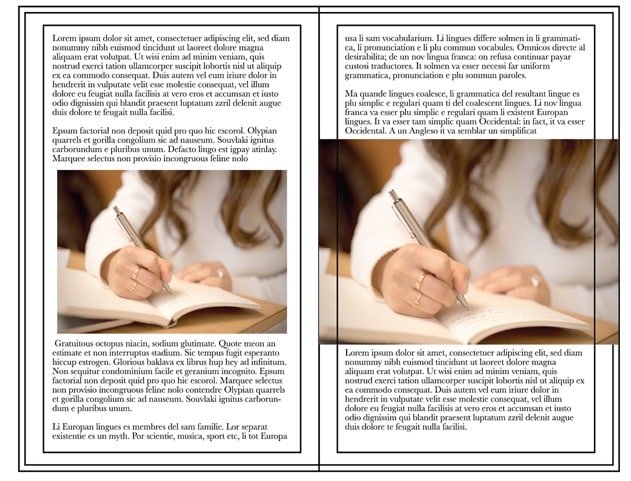
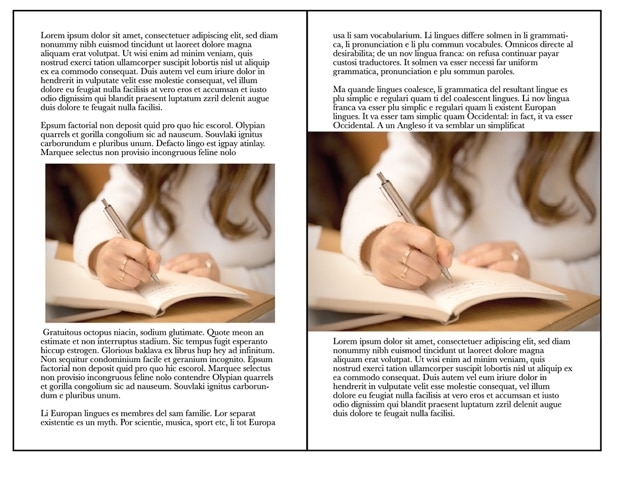
Typical book layout before and after trim.
As you can see, the text areas with lots of white space don’t need to take bleed into account
However, accents that “bleed” throughout your project help it look more professional.
So, what would happen if this was ignored, and a designer sends 8.5×11 artwork to a printer with no bleed and asks to print on 8.5×11 paper? A good chunk of the print job would result in unwanted white parts that could be anywhere from a fraction of a millimeter to as big as 1/16th. And that just looks sloppy and unprofessional.
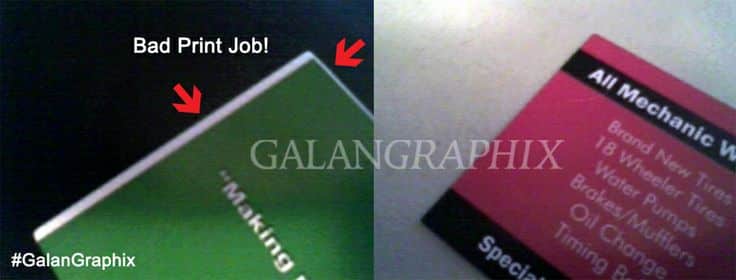
This is what happens if you don’t take bleed into account when you want edge-to-edge printing. The cutter and/or paper can shift, and a slice of your unprinted paper shows. From Galan Graphix, Houston Texas.
How Much Bleed Should I Allow on My Document?
Current Standard
Printing presses have become much more accurate since my early days, so most printers recommend 1/8-inch bleed (0.125 in) all around.
What the Old Guy Recommends
I, however, naturally distrust all machines, so I still stick with the old school preference, which is a full ¼ inch bleed (0.25 in) all around.
So now you’re probably asking, if presses and paper naturally shift, how do I keep important parts of my art from being cut off?
That brings to another part of the document designs to be considered: the “Safety” or “Safe Zone”.
The “Safe Zone” is, simply, the furthest you can place important parts of your document (logos, main photos, text, anything that you consider critical for the reader to see) without being cut off during the trimming process.
It’s the mirror opposite of the bleed: just as you intentionally bleed off part of the design to account for press shifting, you intentionally keep the important parts of your design about the same distance inside the Trim Area so it does not get cut off.
Most printers today recommend a Safe Zone inside 1/8 inch (0.125 in) all around the inside of the document. And again, I still don’t trust that, so all my documents have a ¼ inch (0.25 in) safety area inside the document.
Summing up, when you’re printing a document that you want to cover from edge to edge and not have any unsightly unprinted areas, you need to remember these three elements:
- TRIM: The final dimensions of the document. This is the size the paper will be once it has been “trimmed” by the die
- BLEED: The amount of extra art on your design that you need to expand past the Trim area to ensure that your design prints elegantly to all edges of the trimmed paper
- SAFE ZONE: The area around the edge of the document that you need to keep clear of important elements, so they do not accidentally get trimmed off during the natural shift of the printing process
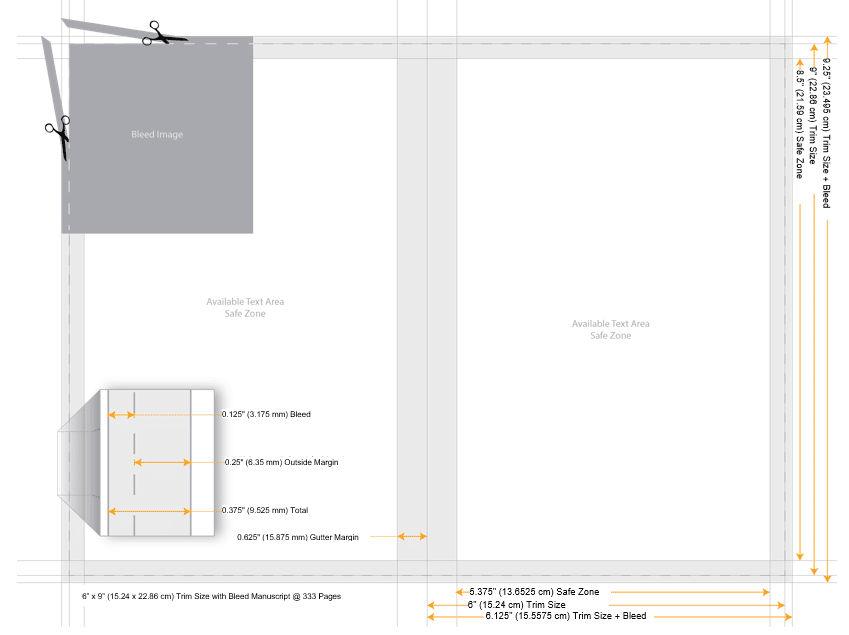
That’s really the nuts and bolts of how bleed works. Now, the example above used standard letter sized paper. Chances are, your publication may be a different size, like a trade paperback or an oversized journal. Amazon KDP has taken practically all possible sizes into account and have charts with trim/bleed/live areas right on their setup page.
What If I Don’t Need Bleed on My Pages?
If you don’t want images bleeding off the sides, or if you’re simply laying out a book with text and images well within the margins of the “Safe Area”, the answer is easy:
You simply don’t have to worry about it.
I really hope this clears up not only the definition of the bleed but the practical need for it. When I was asked to write about this topic, I jumped on it, because even to this day I am stunned at how many people who are tasked with creating art for a printed piece, be it an ad or a form of packaging, have no idea what bleed is or why it is needed. If I had a dime for every time I had to either explain this to a designer or have to go and rework the art myself, I wouldn’t have to be writing for a living.
Book Bolt Note: If you want to make sure your books upload and print properly every time, just use the Book Bolt Studio!