• Posted on

Today, I am going to share with you how you can quickly and easily edit your Book Bolt templates.

If you have your own templates, or you purchased them somewhere else, if they come with Book Bolt files inside, you will be able to edit them to your liking. So in this article, we will show you how to navigate around the Book Bolt Studio, how to edit colors, text, images, and different elements, plus learn how to spice up the background with images.

If you purchased a cover file, or an interior, you can create your own templates and publishing assets from the Book Bolt Studio. This will allow you to customize each template with your brand, your brand colors, your text, and your images. Chances are, most of the design work has already been done if you are bringing these in from somewhere else, all you need to do is edit them to put your personal touch on before you go to publish your work.

It will take you almost no time at all to learn to edit your files. Let’s jump into it!

Step 1: Log In To Book Bolt Studio

In order to edit your templates, you will need to sign up for a trial Book Bolt account, or login. You can do that right here. You will want to sign up for a pro level account as this will let you edit puzzle pages, but each account comes with a free trial so you can edit and customize your templates.

Step 2: Open The Book Bolt Studio

Once you are logged into Book Bolt, you will need to navigate to the studio. You can do that from this link here, or by going to the side menu inside of the software, selecting create, and then clicking on the Studio to log in.

Step 3: Create Your Project

Before you start creating your project and editing your template, you will first need to create a project. This project should match the template that you purchased or are bringing over to edit.

In this case, if you have a template that is a 6X9 size, and 100 pages, we would set this up inside of the Studio with these settings:

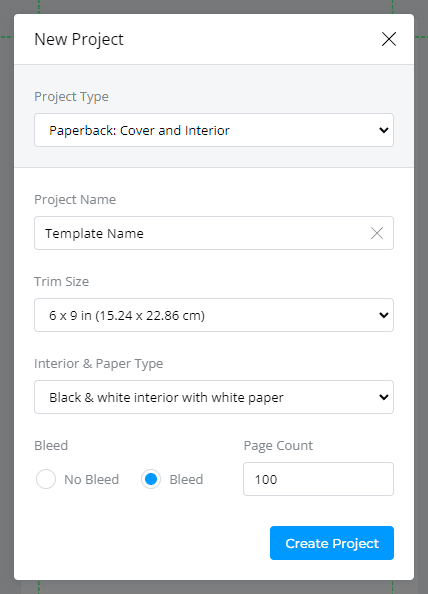
Step 4: Your Dashboard

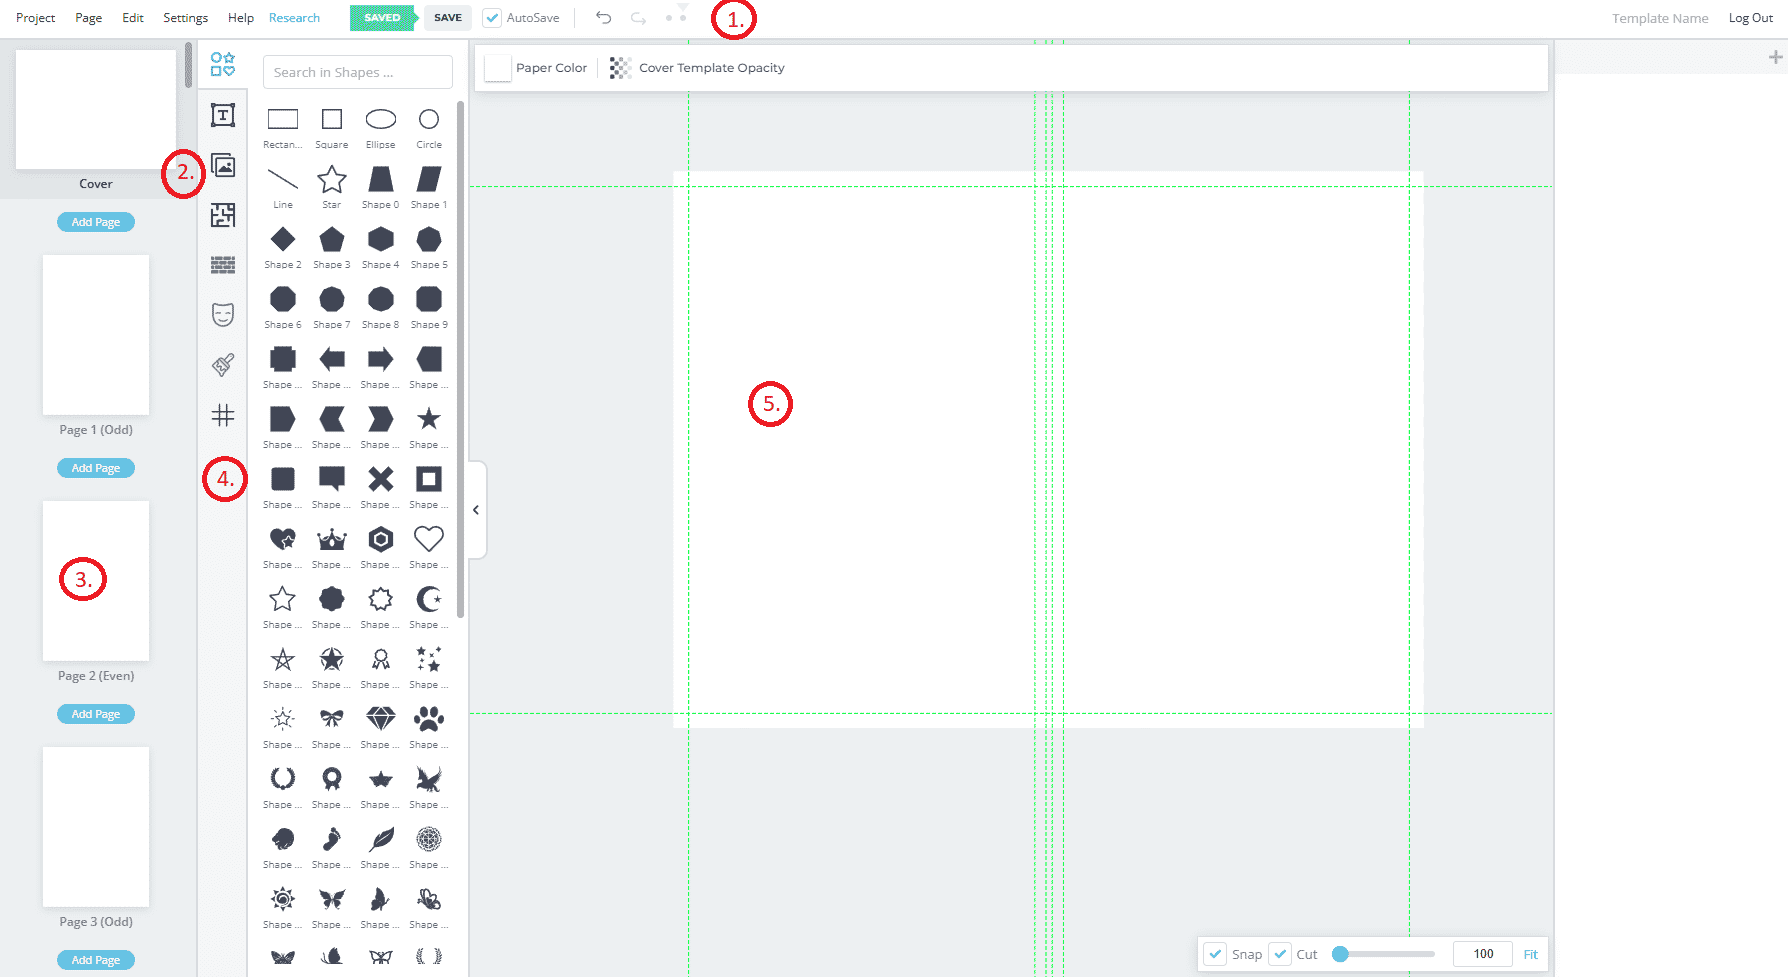
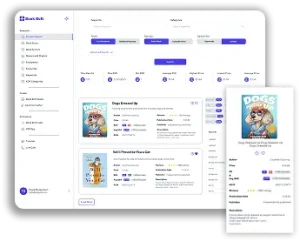
You will now see the full dashboard page. The dashboard is where you will edit your template files, and there is a lot of features for you to access here. We have labeled each part that you will want to pay attention to:

  1. Menu Bar: This is the menu bar where you can save, load, and edit settings for your project. This is where you can also see the current status of your project, and move forward and backward if you make a mistake and want to redo something.
  2. Files Menu: This is your files menu where you can upload individual images, pdfs, or search through the Book Bolt catalog of millions of royalty free images
  3. Page Selection: The left hand menu is all about the project page selection. To select a new page, simply click on the left hand menu and select the page you want to edit
  4. Editing Menu: The editing menu will contain all of your options to adding new interiors, text, puzzles, masks, gridlines and more. This also contains the files menu as mentioned above.
  5. Page Preview: This is the page preview where your changes will show up and the canvas on which you want to work on.

Step 5: Upload Your Template To Edit

If you purchased a template and are looking to edit it through the Book Bolt Studio, you need to make sure that the files you were presented with have a sources file, that have .JSON files.

These type of files are specifically used to edit templates directly inside of the Book Bolt Studio.

To upload your first template to start editing, simply go to the top menu, click on page, and click on load from file.

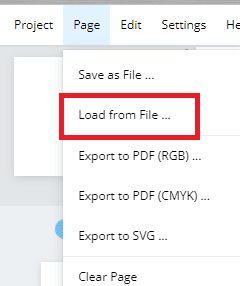
Select the template file that you want to load from your computer, and click okay.

This will then import the template directly into Book Bolt Studio so that you can start editing everything you need.

Step 6: Edit The Colors Of The Paper

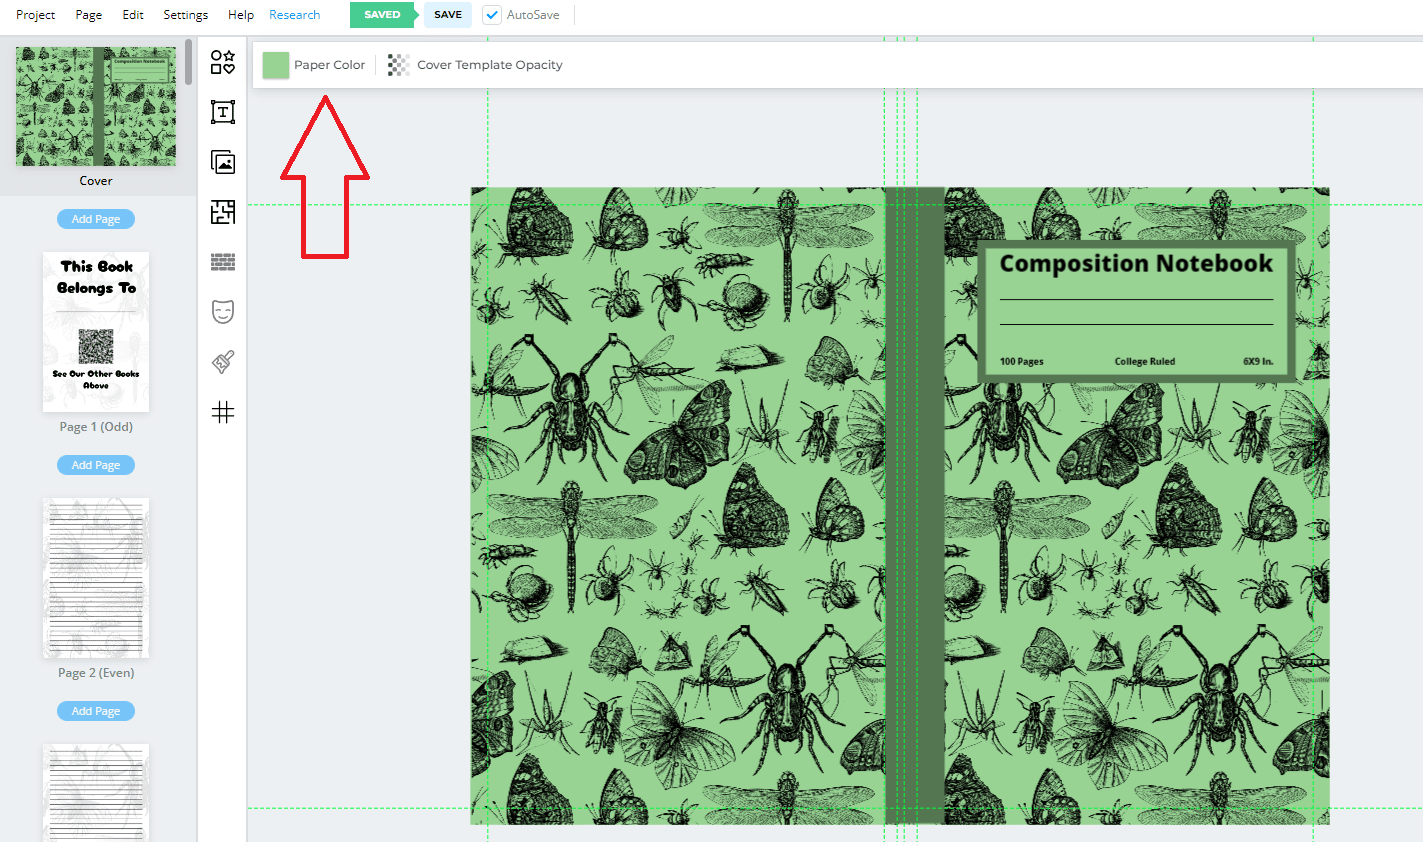
In order to edit the paper color on your project, simply click the top menu that says paper color, and change it here.

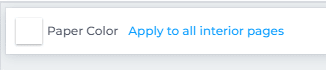
Note: To edit all the page colors, make sure you have a page (and not the cover selected), and then click on the “apply to all interior pages” button:

Step 7: Editing The Text & Fonts

To change the text on any of the pages or the cover, you first want to make sure you have selected the “object”. This can be done in the far right hand menu, or by clicking on the text in the canvas on your screen.

Once you have a piece of text selected, you can change the size, the color, the alignment, the positioning, the opacity and more:

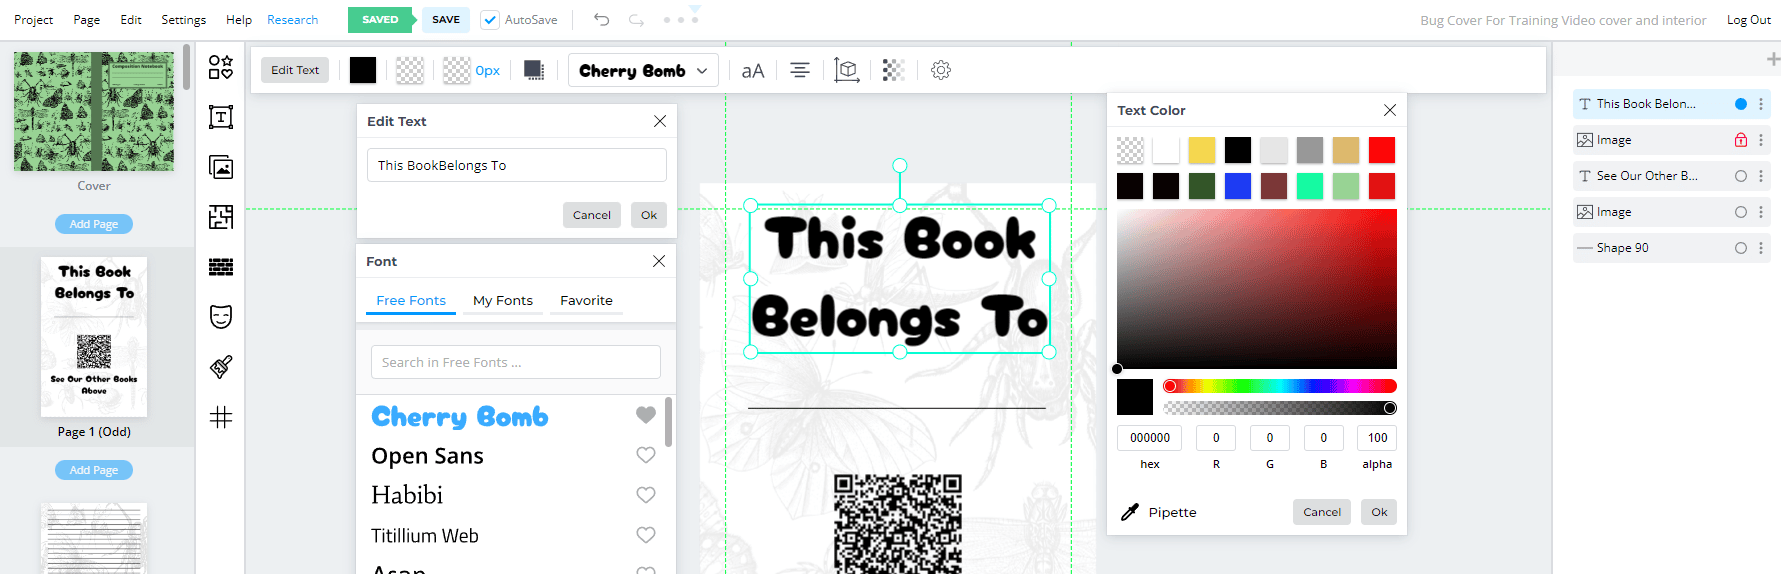
Each time you click on an object, you will have a new menu bar at the top. The drop down menu will allow you to select from over 1,000 commercially free fonts as well as upload any that you want that are saved on your computer:

Step 8: Editing The Images

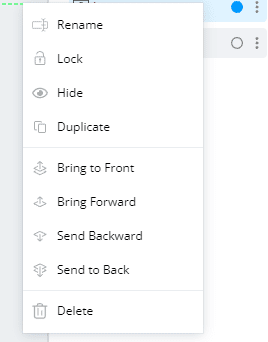
In order to edit the images or change the photos, you will want to first select the photo on the page. Once you have it selected, go to the right hand menu, and make sure to LOCK this object (so that if you make a mistake, you can go back and get to it), as well as hide it. You can set this option by right clicking in the object menu:

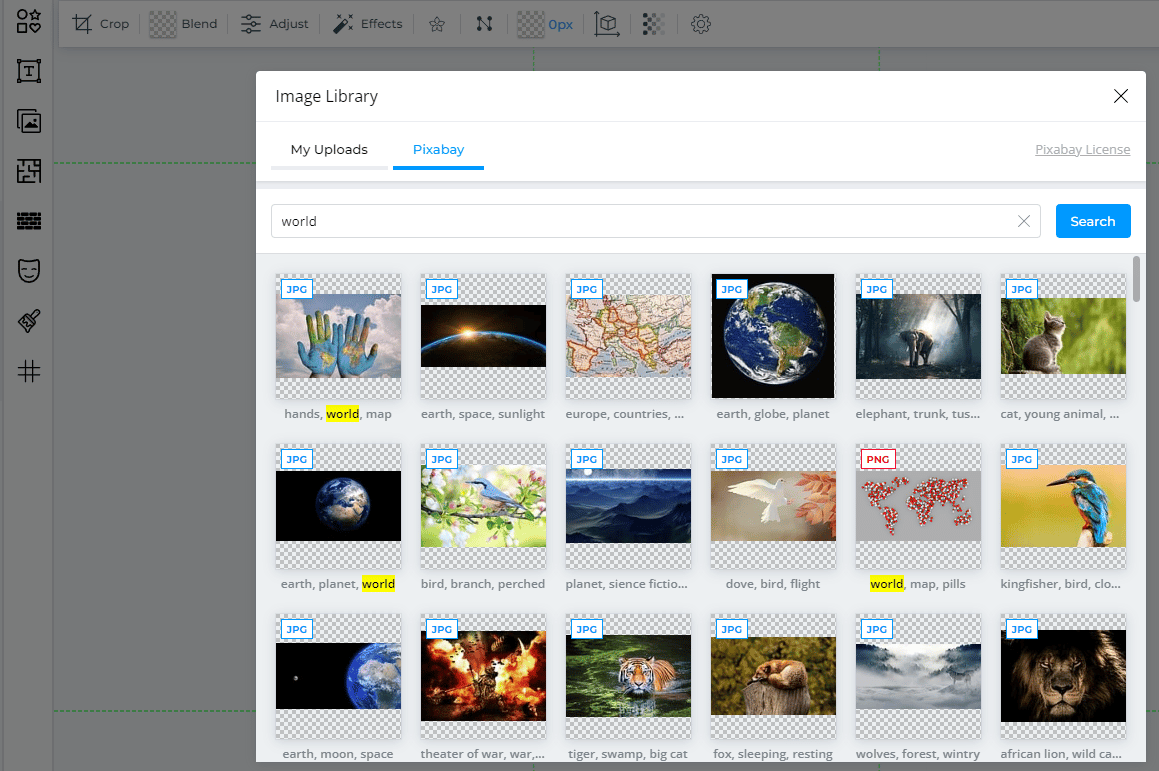
Once you have done that, Use the side bar option to open up the image library. This menu will allow you to upload your own images, or select from image providers inside of the Book Bolt Studio. Once something is selected, simply click on it to add it to the canvas:

Step 9: Spicing Up Your Interiors

No matter if you bought a template from somewhere else, or you are creating one from scratch, we always recommend adding a little flair to the back of your interiors.

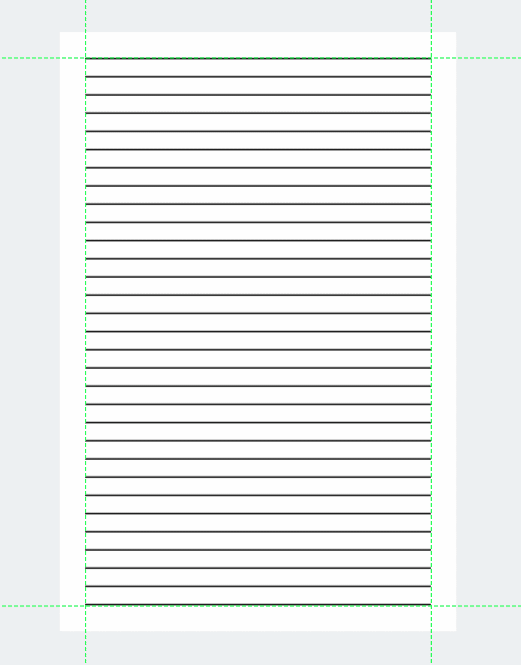
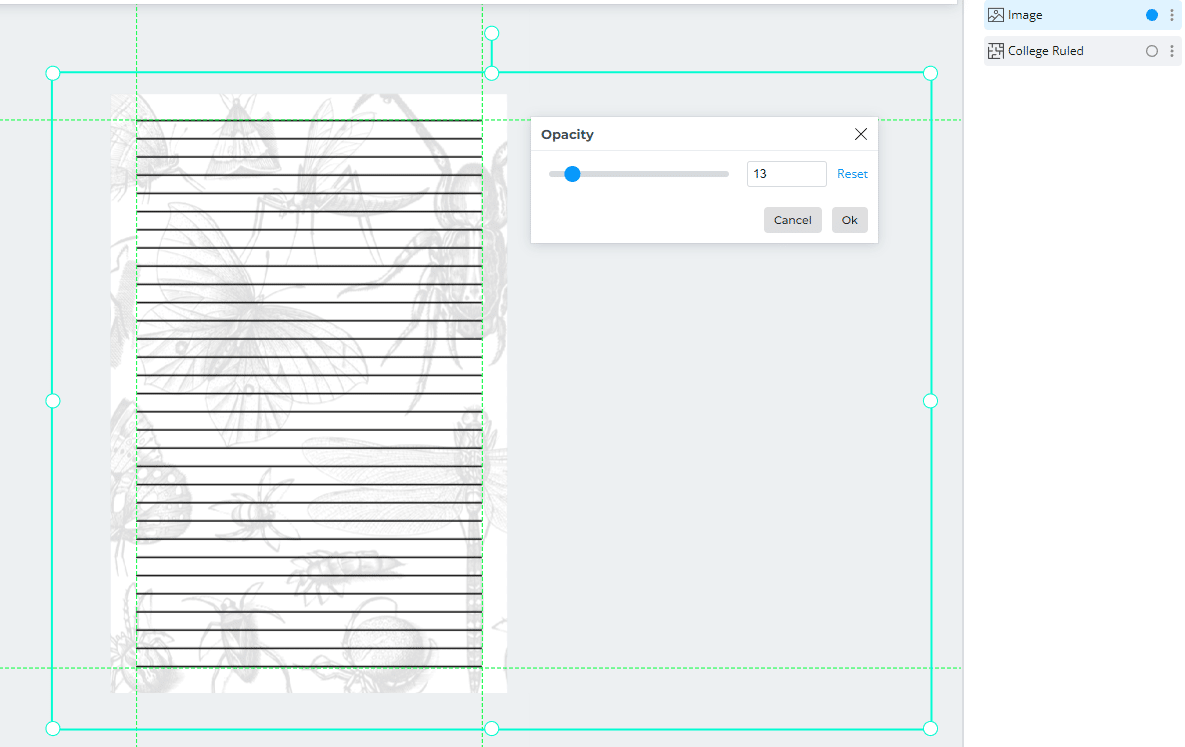
To do this, you will first want to have an interior file. You can see on this page, we have lined pages:

Next, find an image and overlay it over top of the lines:

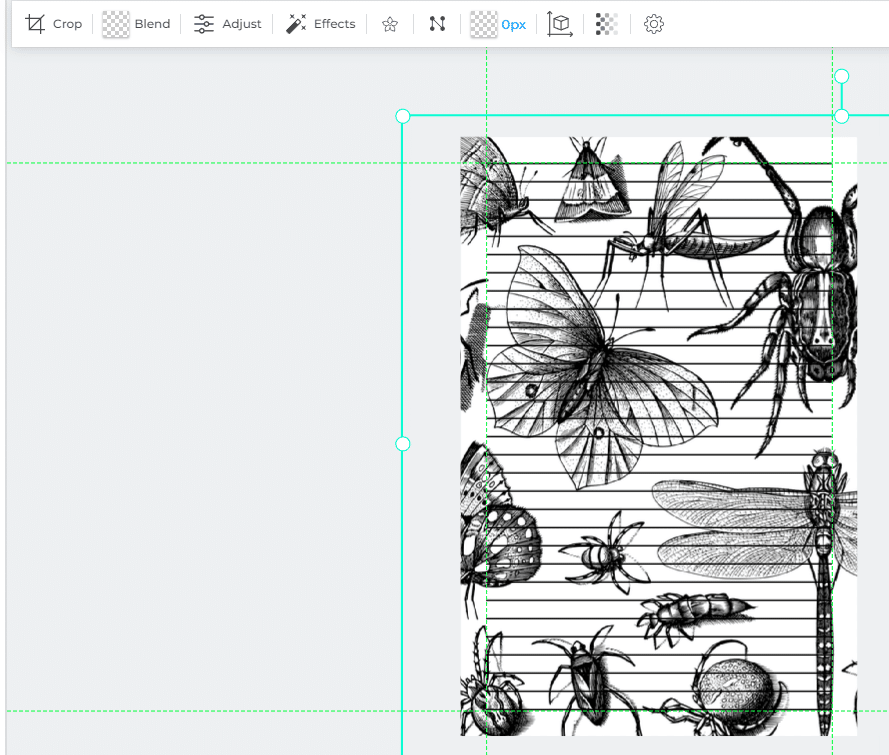
If the image is not black and white, you can go to the top menu once the object is selected, click on effects, and then change the image to black and white.

Finally, click on the opacity changer in the top menu, and slide the opacity down until it blends into the background:

Step 10: Saving Your Files

Once you have uploaded your template, made the customizations and edits that you wanted, it is time to save your project and download it so that you can upload your book!

To do this, first, hit the “save” button in the top menu. This will ensure the project is saved and you can come back to edit again in the future if you would like:

Now, head up to the top menu again, click on “Project”, and select download.

This will download your project as a ZIP file.

Simply unzip the file to your computer, and you will have your sources file along with both PDFs that are ready to publish!

67 Comment

  1. Kaye Rowley

    Hi I created an 8.5 x 11 paperback in book bolt. I then wanted to use all the same information in the interior/cover to put into a hardcover. I have not found it easy. Is there an easy way to clone it into a hardcopy? Or is there a way?

    1. admin

      You would need to create a new project, and then upload the pages from your “sources” folder in your original download!

  2. Toni Green

    I don’t see how to reorder the pages or delete blank pages from my book

      1. Michelle

        If you are using a mac book, hover over page to the left, Control-click: Press and hold the Control key while you click an item.

    1. Nikki

      Right click on the image on the left side and it will say move up, down or to what page. I haven’t deleted pages but I am sure it the same right click

  3. yesenia gaviria

    I was having the same issue and tried doing that but when I attempt to download, it says wrong format.

  4. Wynika

    Hello! I’m having issues with word search puzzle on book bolt. The puzzles all look like a bunch of letters overlapping each other. How do I fix this?

    1. admin

      This probably means you have more than 1 puzzle on the page. Take a look at your objects menu on the left hand side of the screen and turn them off 1 at a time.

  5. Ieasha c

    If I create my own interior design in goggle doc can I upload it as an template in book bolt?

    1. admin

      You sure can. Just make sure to save them as a PDF and then you can upload them to the file library inside of the Studio.

  6. Tiffany

    I just made 200 page words search puzzle book with the solutions after the puzzles. By mistake I added a new blank page and I can’t delete it. How can I get rid of this extra page?

      1. Ang

        This does not work. A message saying its you cannot appear. How do I delete unwanted page’s

  7. Terry

    Hi I finally finish and was able to upload to CSV. However, after the last page, the soluton page does not come up after the last page. Does it matter whether you use a mac laptop? I even created a ticket twice and no avail.

    1. admin

      You will need to make sure that you have enough pages in your project to accommodate the solutions after all the puzzle pages are generated.

    2. James

      If you want the solutions to be produced, ensure you have enough pages selected in the template. For example, a fifty (50) page puzzle with solutions would need one hundred (100) pages selected for both the cover and interior templates to work correctly.

  8. Chris Del

    Hi,
    I’m working on a kids’ 50 page coloring book. I’m in the book bolt studio and my cover page is labeled page #1. Is there any way to change the page numbers?

    1. admin

      Page numbers can only be added by adding the blank page template with numbers. If you have added this, you can go to the right hand menu on that page, and remove the template.

  9. Rhonda

    Hi I just completed my first planner in Book Bolt, I Have decided to change the book interior to color instead of black and white, how do I edit the information?

  10. Shanna

    I’m working on a new project now and I’m gonna need to upload alot of pics I already have on my laptop but I have so many images uploaded already from previous projects but I wanted to clear them out of my way. Can I hit empty to get them out of there and clear It? When I do hit empty it says it will delete them from my pages. Now does that mean on a current project that I would be working on or will it delete the pics from projects already completed and saved?

    1. admin

      This will delete them all and remove them from the pages since they will not be uploaded anymore. If you want to keep them, you can organize them into folders.

  11. Leah

    I designed a page and want to move it to a new location, how do I select and move an entire page?

  12. Rae

    Hi!
    I created a page using the BB studio in one project in Book Bolt, and I would like to use that same page in another project. Is there a way to easily copy an entire page from one project to another? I haven’t downloaded either project yet.
    Thank you!

    1. admin

      Download the single page as a pdf from the top menu. Then open up the file library, and upload this PDF which will put it into a folder. You can then use this in any project you would like.

  13. Helder

    Hi, is there a possible way to resize, as in canva? how do i do that?

  14. Bih

    Hi, I am currently working on a word search project. I changed the words on the page to all caps but I am unable to exit the editing mode. How do I exit the “editing contents” option when I’m done?

  15. Tama

    Hi, is there a way to copy an image or design I’ve added to my puzzle book, to all pages of my interior? I’m creating a 300 page Puzzle Book and I find it time consuming to keep copying and pasting from one page to another. I wanted to add a little flair to my puzzle book.

    1. admin

      Yes. You will want to right click on the page in the left hand menu, and then clone that page to all others.

      1. June

        Cloning did not work for me… I was able to clone 120 images but they stayed on the page selected. I could not get the studio to select all either. I was going to try to copy and paste on all.

        1. admin

          To do this, you will want to fill out a single page. Then right click on the page in the left hand menu and clone that page to all others in the project.

  16. Sue

    I have created my own interior page using Excel. Can I use that, or does it have to be a Book Bolt lined page template? It also has color. Would that work? I’m trying to get answers before I create an account, and I cannot find the answer anywhere.

    1. admin

      You would want to first save it as a PDF, then you can upload this to the Studio. You can use color as well, but this will have higher base printing costs through KDP.

  17. Francisca

    Hi! I paid for the pro to have the graphics, so i downloaded them to my computer and then I am having trouble uploading it. It was downloaded into my computer as a WinRAR Zip archive, I don’t know if that is the problem and I don’t know how to change that.

    1. admin

      Hello, these will download as a zip file so you will need to right click on the folder and extract them.

  18. Alessio

    I made some changes while making the book, and now I’ve got too many pages.
    Is it possible to delete the extra pages?

  19. Joao PEreira

    Thank you so much for this helpful article. One thing that is bugging me though is the inability to scroll a page. Maybe I am missing something, all I can do is zoom in and out, so normally I have to re-fit the page and then zoom on the bit I want to change, and if I remember that I need to change something else a bit below, I cannot scroll down, I have to again reset the zoom and then zoom in on the bit I want changing.

    1. admin

      If you are zoomed in, hold down your space bar, and then click the canvas to drag it around.

  20. Anna

    I would like to add the same image to all pages of my book to use it like a background, but I couldn’t find the way to do it automatically.
    Something like “apply to all interior pages” for the color, or your “Template pages” that can be used in all the book.
    I guess there is a such command, but I couldn’t find it
    Thank you in advance

    1. admin

      Once you do this on a single page, right click on the page in the left hand menu, and clone that page to the rest of your project.

  21. Bev

    Is there a way to change page size in book bolt or would I have to start a completely new project?
    I made 5.25 x 8, 150 journal notebook and kdp is rejecting the size.

    1. admin

      You will want to create a new project and then upload your files from your previous project.

  22. RC

    How do you lock the template? In my project, I am using the lined pages template but when I move my font – I’m actually moving the lined page.

    1. admin

      In the right hand menu, select the layer and then right click and select the lock option.

  23. chloe

    There isnt a download pdf option. I hit on project the only options are to clone. Then i try the download button and there isnt a way to download as pdf only cmjk, ive been at this for hours, literally wont work.

  24. Christine

    Is there a quick way to delete multiple pages at once? I am working on a puzzle book and have to include extra pages for the answers, then have like 20 blank pages left when I consolidate answers 4 to a page. Currently, I am clicking on each page on the left hand side and deleting each one at a time. It’s taking quite a while, especially since it takes a few moments to reload all the pages after deleting just the one. Is there a way to delete more than one page at a time?

    1. admin

      You will want to hold down control on your keyboard and then select the pages in the left hand menu of the studio. Once you have done that, right click and delete the pages.

    2. Stephanie

      How do you consolidate answers to 4 to a page? I’ve been Googling that and it brought me to you, hope you dont mind me cutting in on your question to ask you a question.

    1. admin

      Make sure nothing is selected, and this option would then be under the transparency option in the top menu.

  25. Karlene

    Hi:
    When I started creating my project, I selected 32 pages. However, I now want 38 pages. Where do I go to reset the number of pages for this project?

    1. admin

      You would simply click on the “add pages” button in the left hand menu a few times to get to your desired page count.

  26. CB

    I’m adding sentences to each individual page that I wrote out in a Word file. I am trying to copy/paste into Book Bolt but when I right click either in the text box or in the box itself, the option doesn’t appear. How can I copy/Paste info I want to add so I don’t have to write everything all over again?

  27. Erika

    Can we paste an image inside the back cover like the conversion tables in a composition notebook?

  28. Hannah

    I am creating a journal. I have my pages exactly like I want them. I just need to make one change to the lettering and want it duplicated to each page. How would I do this?

    1. admin

      Once you are done with 1 page, just right click on the page in the Book Bolt Studio in the left menu and select clone.

  29. Laura

    I created a 100 page coloring book. I didn’t realize that I had made a few scribbles on the back of one of the pages (the blank side) and it was published that way. I went back and deleted the scribble, saved and proof read it and it looked perfect but when I republished the book, the scribble was still there. I have gone in and edited it three times, saved and proof read it but it still shows up on the page when published. I also deleted the page, then added it again it as new blank page, and it looked good but the scribble still shows up in the published book. I don’t know what else to do, it is a very obvious mistake. How can I get rid of it?

Leave a Reply

Your email address will not be published. Required fields are marked *